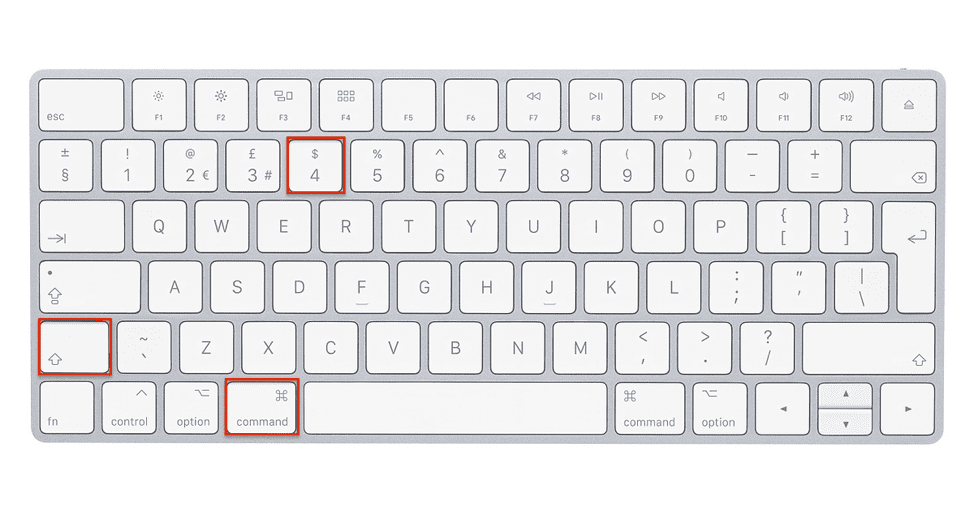
Here are 4 simple ways to take a screenshot on Mac:
1. Using keyboard shortcuts
The easiest way to take a screenshot on Mac is to use keyboard shortcuts. There are different shortcuts for taking screenshots of different parts of your screen.
There are 3 basic ways to take screenshots on Mac. You can use keyboard shortcuts, the Touch Bar, or the Screenshot app. Screenshots can be saved, deleted, and opened in a variety of ways.
- To take a screenshot of the entire screen: Press
Shift+Command+3. - To take a screenshot of a selected area: Press
Shift+Command+4. Then, use your mouse or trackpad to drag a selection area. - To take a screenshot of a specific window: Press
Shift+Command+4and then press theSpacebar. This will change the cursor to a crosshair. Click on the window you want to screenshot.
Here is a table of the keyboard shortcuts for taking screenshots:
| Screenshot type | Keyboard shortcut |
|---|---|
| Entire screen | Shift+Command+3 |
| Selected area | Shift+Command+4 |
| Specific window | Shift+Command+4 + Space |
2. Using the Screenshot app
You can also use the Screenshot app to take screenshots. This app gives you more control over how your screenshots are taken and saved.
To open the Screenshot app, press Shift+Command+5. Then, you can use the following options:
- Capture Entire Screen: This will take a screenshot of your entire screen.
- Capture Selected Portion: This will let you drag a selection area to capture a specific part of your screen.
- Capture Window: This will take a screenshot of the currently active window.
- Capture Menu Bar: This will take a screenshot of the menu bar at the top of your screen.
- Capture Screenshot with Timer: This will let you set a timer before the screenshot is taken.
3. Using the Grab app
The Grab app is a more advanced screenshot tool that comes with macOS. It gives you even more control over how your screenshots are taken and saved.
To open the Grab app, go to Finder > Applications > Utilities > Grab. Then, you can use the following options:
- Capture Screenshot: This will take a screenshot of your entire screen.
- Capture Selection: This will let you drag a selection area to capture a specific part of your screen.
- Capture Window: This will take a screenshot of the currently active window.
- Capture Screen Recording: This will let you record a video of your screen.
- Options: This will let you set various options for your screenshots, such as the file format and the delay before the screenshot is taken.
4. Using a third-party screenshot tool
There are many third-party screenshot tools available for Mac. These tools often offer more features and customization options than the built-in screenshot tools.
Some popular third-party screenshot tools include:
- Snagit: This is a powerful screenshot tool that offers a wide range of features, including the ability to record screen recordings, annotate screenshots, and share screenshots online.
- Lightshot: This is a lightweight screenshot tool that is easy to use. It offers a simple interface and a variety of features, such as the ability to annotate screenshots and share screenshots online.
- Skitch: This is a screenshot tool from Evernote. It offers a variety of features, including the ability to annotate screenshots, draw on screenshots, and share screenshots online.
I hope this helps! Let me know if you have any other questions.
