Introduction to Real Estate Photography with an iPhone
Taking high-quality real estate photos with your iPhone is both an accessible and effective way to showcase properties. With the advancements in smartphone camera technology, you can capture stunning images that can help sell or rent homes. Here are some essential tips and techniques to maximize your iPhone’s capabilities for real estate photography.
1. Prepare Your Space
Before you start shooting, ensure the property is clean and clutter-free. Here are some steps to prepare:
- Declutter: Remove personal items and excess furniture for a more inviting look.
- Staging: Consider staging rooms to enhance their appeal. Use fresh flowers or strategically placed decor.
- Lighting: Open curtains and blinds to allow natural light in, and turn on lights in darker areas.
2. Use the Right Settings
Familiarize yourself with your iPhone’s camera settings to improve image quality:
- Gridlines: Enable gridlines in your camera settings to help you follow the rule of thirds.
- HDR Mode: Use High Dynamic Range (HDR) mode to capture a balanced exposure, especially in challenging lighting conditions.
- Focus and Exposure: Tap on the screen to focus on specific areas and adjust the exposure by sliding your finger up or down.
3. Utilize Good Lighting
Natural light plays a critical role in photography. Here are tips for utilizing it effectively:
- Golden Hour: Shoot during the golden hour (early morning or late afternoon) for softer, more flattering light.
- Avoid Harsh Shadows: Take photos on cloudy days or choose shaded areas to minimize harsh shadows and high contrast.
4. Composition Techniques
Composition can make or break a photo. Consider these techniques:
- Wide Angles: Use your iPhone’s ultra-wide mode, if available, to capture more of the room in each shot.
- Straight Lines: Ensure lines (walls, windows) are straight by keeping your phone level. Use gridlines for guidance.
- Variety of Angles: Capture multiple angles of each room to provide a comprehensive view.
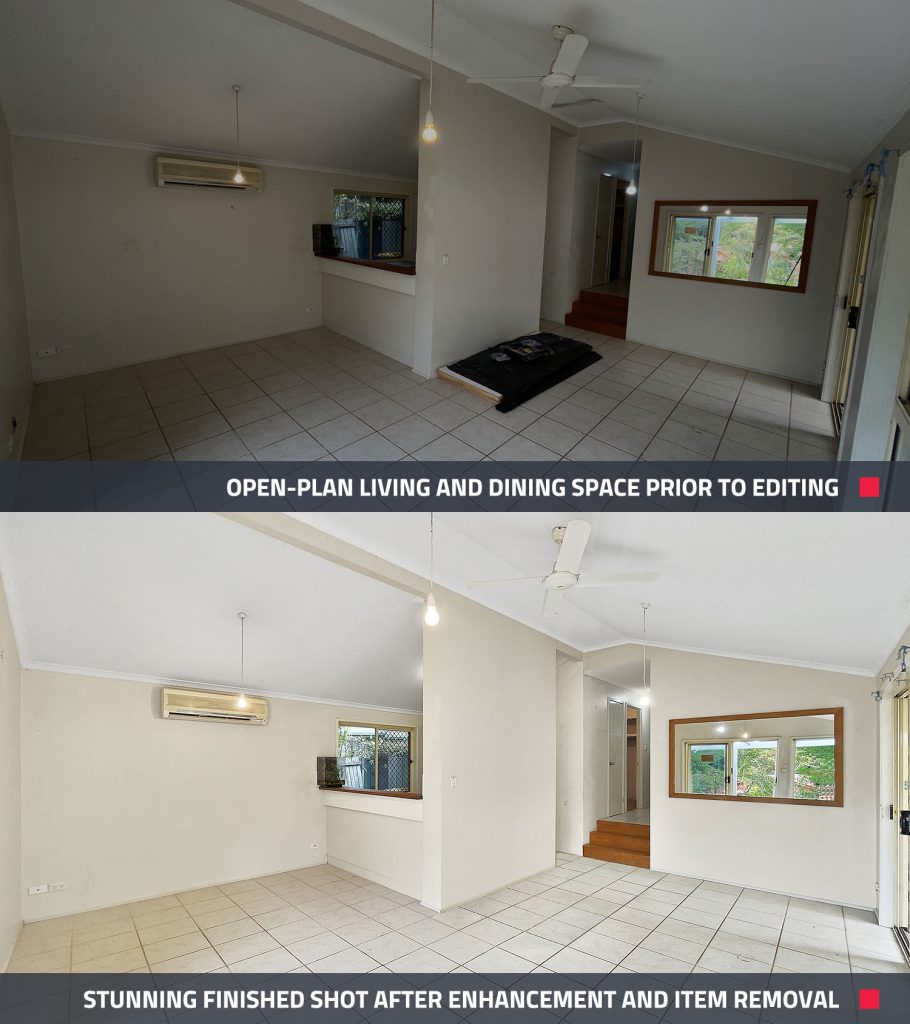
5. Editing Your Photos
Post-processing can elevate your real estate photos:
- Editing Apps: Use editing apps like Snapseed or Lightroom to adjust brightness, contrast, and saturation.
- Filters: Be cautious with filters; aim for a natural look that enhances the image without overwhelming it.
6. Finalizing Your Shots
Consider the following before finalizing your photos for listings:
- Resolution: Ensure your images are high resolution suitable for online listings or printed materials.
- Consistency: Aim for a consistent style throughout your images, including color balance and lighting.
Conclusion
By using these tips and techniques, you can effectively take beautiful real estate photos with your iPhone. Good preparation, lighting, and composition can significantly enhance your property’s visual appeal, helping you attract potential buyers or renters. With practice, your iPhone photography skills will improve, enabling you to showcase properties in the best light possible.
